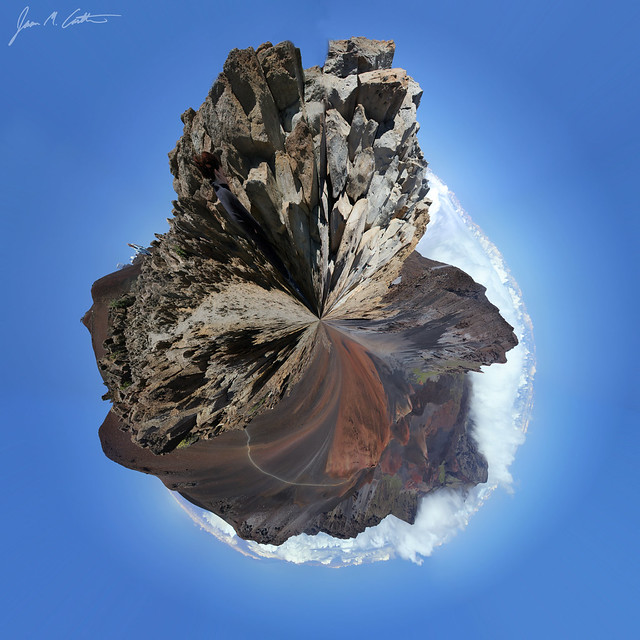
When my wife and I were standing at the top of the world (okay, at 10,000 feet above sea level on a dormant volcano), the idea popped into my head to do one of those cool planet photos. So I stood in one spot and took roughly 8 photos that I could play with later – once I did a Google search on how to do it in Photoshop.
Canon 60D | 18-135mm lens | 1/100 | f/7.1 | ISO 100 | Circular Polarizer Filter
When taking the panorama, I set the camera to manual mode so the sky and other exposure elements were more consistent throughout. I sort of did this on the fly, so it wasn’t very well thought out. I tried to take a panorama from a higher point, but some tourists from Germany were hanging out near the top and I felt awkward taking the panoramas with them standing right there. It was 50 degrees outside with a frigid wind blowing our eardrums to near freezing – so we didn’t hang out there waiting for the tourists to move.
Once I got back to the hotel and had time to play with the photos, I downloaded a trial version of Panorama Maker 5 and had it stitch the photos together. It kept freezing, but I was able to eventually make it work.
Then I imported the completed Panorama into Photoshop. I made the panorama a square by stretching the height to the same length. I rotated the image 180-degrees, then used Filter –> Distort –> Polar Coordinates. When I hit Ok, it created Planet Haleakala. All I had to do was use Rubber Stamp to merge the seam together a little better and edit out a person or two, and Viola!
Click here to check out the Website I used to learn how to do this in Photoshop.
There are a few things I learned from doing this, and so I’ll have to try again in a different setting and see how the outcome changes.
~signed, Carltonaut
