I saw a family photo shoot on Pinterest using a box and thought it would be a fun photo to try – but I didn’t think my family would be game for this type of photo shoot. So when I was able to get a Lego Gingerbread Man, Lego Elf and Lego Santa Claus, I figured… why not?
Since I had so much fun building and setting up the photo shoot, snapping the photos after troubleshooting the right lighting, then taking the photos into Lightroom and Photoshop to create the final layout, I thought I would walk you through how I did it.
BUILDING THE BOX
I was thinking I could use a square jewelry box, but I wasn’t sure it would be the right size – so I decided to make my own. I used the back cardboard page of a notebook and cut it to 1.75″ squares with a little tab at one end of the run to use in attaching the squares into a box. I then cut a single square and used black duct tape to attach it to the back of the box, and to hold the box together in general.
LIGHTING THE SCENE
I was trying to figure out the best way to get the subject lit up without creating harsh shadows. Many of my other photos with my kids as the models have resulted in shadows that I would have to fight to remove. With how small this box and Lego minifigures were, I know the on-camera flash or a hot shoe flash would not do what I needed. I strong contemplated and actually began trying to build a ring light that I could put around my wide-angle lens to provide even lighting. But for my own sanity, I decided to go with a long exposure (roughly 20 seconds) and use my LED Flashmate light to help illuminate the scene. But in order to reduce strong shadows, I move the light in a broad circle around the camera at various distances from the box and succeeded in getting the lighting situation I wanted.
SETTING UP THE CAMERA AND BOX
I had originally thought of using my 100mm macro lens and shooting the box from a distance. But I wanted to be able to see the four inside sides of the box, which meant I needed to be closer to the box. So I put on my 10-22mm lens, and that was the right move. I was able to get within six inches of the minifigure, offering a good angle for my desired look.
As for the camera settings, I had everything set to Manual, including manual focus, and had total control of the scene. As mentioned previously, I went with the longer exposure, and in order to help achieve that, I needed a small aperture – which also provided me with a larger depth of field to help keep everything in the box in focus.
Since I needed to have all of the 15 photos with the same position, I used some duct tape to attach my cardboard box to a solid surface, which allowed me to easily move the minifigures in and out of the box, without messing up my view inside the box between photos. This simple step was vital to making the photo possible without driving me crazy.
POST PRODUCTION
Once I had my 17 photos (yes, I captured a couple extra so I could have some variety to work with in the final layout), I imported all of them into Lightroom, but I didn’t do any additional editing on the photos before opening each of them in Photoshop. Here are the five steps I had to take in Photoshop to assure all the photos would line up once placed together in a single photo:
- Make the photo a layer
- Delete most of the background (leaving about an inch around the box for wiggle room) from the photo
- Drag in a guide for the left side of the box, then adjust the upper-left corner of the image until the left side of the box runs parallel to the guide.
- Do the same thing for the other three sides of the box to assure the corners are a perpendicular as possible (because of the sides are not straight up and down or left and right, they won’t line up right with the other boxes in the photo)
- Draw a selection box right up to the guide on each side to delete any extra background outside of the box
- Use the magic wand tool to select the areas around each corner of the box, since they were sightly rounded.
- Do any levels adjustments, brightness/contrast changes, or dodging or burning as needed.
- Drag the now single image into another white-background project in Photoshop, but don’t adjust any of the sizes until you get all of the boxes added, that way you can keep all boxes the same size for when you go to line them up.
- Adjust each of the box positions to the desired location in your overall setup.
CONCLUSION
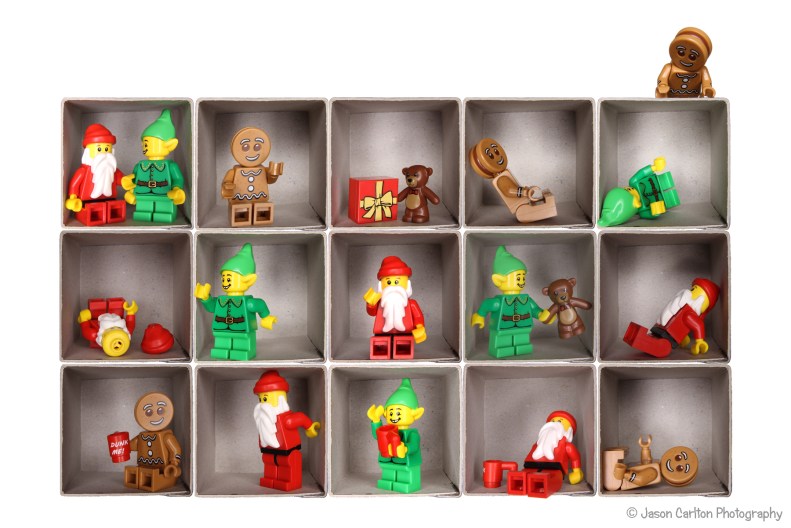
It was a fun photo to set up and I chuckle at the finished product. I hope this photo brings a smile to your face as well, and that you would be willing to share this photo to pass along the holiday Lego cheer.
~signed, Carltonaut
